There’s no doubt that at some point as a runner (especially if you enjoy trail running), you’ve probably experienced a sprained ankle.
It’s a feeling that can literally stop you in your tracks. One minute you’re cruising along, and the next you’re on the ground, clutching your ankle in pain.
And if I’ve learnt anything from working with running clients on their sprained ankle treatment, it’s that the chance of another ankle sprain in the future is much higher after experiencing the initial injury!
In this post, we’ll discuss some of the best ways that runners can prevent ankle sprains and how to approach your sprained ankle treatment if they do occur.
Whether you just started running or have been pounding the pavement for years, read on for some valuable information that can keep your ankles healthy and injury-free.
Sprained Ankles: What Happens
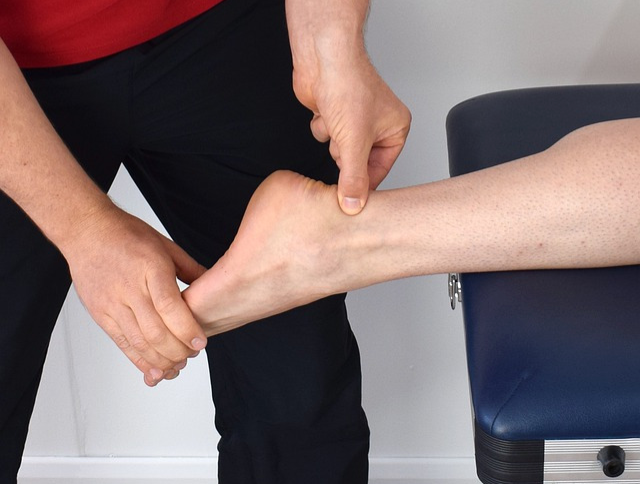
Acute ankle sprains often involve injury primarily to the anterior talofibular ligament (ATFL), and the calcaneofibular ligament (CFL) – two ligaments on the outer aspect of the ankle joint.
These are the main tissues which are stretched during an “inversion” injury – when you roll over on the outside of your ankle. If the ligaments are stretched beyond their capacity they will either partially or completely tear and this is reflected in the grade of the injury: grade one, two or three.
A grade one sprain is considered to be mild, and typically involves only a partial tear of the ligament – less than 50% of the fibers. This type of sprain may cause some pain and swelling, but usually heals within a few weeks.
A grade two sprain is more serious, but is still considered a partial tear. In a grade sprain, more than 50% of the ligament fibers are torn, however some are still intact. This can lead to significant pain, swelling, and instability at the joint. Grade two sprains usually take several weeks to heal, and may require physical therapy.
A grade three sprain is the most severe type of sprain, and involves a complete rupture of one or more ligaments. Whilst this will normally result in a longer stint on the sidelines than a grade one or two sprain, not all hope is lost – as long as you rehabilitate your ankle well, and focus on improving your ankle balance and proprioception, then you can significantly reduce the likelihood of of recurrence and restore the stability in the ankle joint even with a grade three ligament sprain.
Dynamic Stability and Proprioception
When we think about preventing ankle sprains, the first thing that usually comes to mind is the strength of the muscles surrounding the ankle joint. And while strength is certainly important, it’s only part of the story.
For runners, dynamic ankle stability – the ability to maintain balance and control while in motion; and proprioception – our brain’s ability to determine our joint position in space – is equally (if not more) important.
When we run, our ankles are subjected to a tremendous amount of force. With each step, they have to absorb the impact of our body weight while also propelling us forward. Add on to that changes of direction, or changes in the running surface – like divots in grass, uneven stairs, or loose rocks on the trails, then you can imagine that our body’s proprioception and dynamic stability becomes even more important.
In addition to improving dynamic stability and proprioception, building adequate ankle mobility and strength is also essential. These elements are closely linked and will help you run with better form and prevent injuries.
Sprained Ankle Treatment
If you do happen to suffer an ankle sprain whilst running, there are a few different stages that you are going to go through, from immediately post-injury right through to advanced rehab and return to running.
Here’s what you need to know:
Stage 1 – Immediately Post Injury
You’ve just hobbled home after rolling your ankle on the trails, leaving both your ankle and your ego feeling battered and bruised. During the early stages post injury, I recommend a period of “relative rest”.
The goal is to reduce the pain and swelling as quickly as possible, so that you can then become a little more aggressive with your rehab later on.
Utilize the RICE method for the first couple of days after your ankle injury.
Rest: Avoid activities that put stress on the injured ankle.
Ice: Apply ice to the injured area for 20 minutes at a time to reduce swelling and pain.
Compression: Use an elastic bandage or compression sleeve to help reduce swelling.
Elevation: Prop your foot up on a pillow while sitting or lying down.
It’s important to mention that the prolonged use of ice has received criticism in recent years for potentially delaying the healing and recovery process. However, it’s important not to throw the baby out with the ice water.
Remember, the goal in the early stage is to reduce the pain and swelling enough to enable you to start rehab as soon as possible. After all, if you’re limping around on a sore and swollen ankle, that’s not going to help to speed up your recovery.
If you experience significant pain and swelling after your ankle sprain, then I would ice, ice, baby (at least for the first couple of days).
It’s not uncommon to experience some ongoing joint pain and swelling for quite a while after an ankle sprain, especially upon returning to running. But as long as you rehab your injury properly, and focus on improving your ankle stability, mobility and strength, then this shouldn’t stop you from returning to your best!
Stage 2 – Start Moving
After a period of relative rest (this could be 1-2 days depending on the grade of injury), we want to begin restoring your ankle mobility, strength, and proprioception. Your ankle is still going to be swollen and painful, and the range of motion (especially dorsiflexion) is going to be limited.
Some mild discomfort when performing your rehab is OK during this stage. Depending on your grade of injury this stage could last a few days, up to several weeks.
Start with these exercises:
Banded Dorsiflexion stretch
To perform the banded dorsiflexion stretch, place a strong band around your ankle, and make sure that the other end is secured around something sturdy that isn’t going to move. Make sure that there is a good amount of tension on the band – it should feel as if the band is sliding your shin bone backwards on the top of your foot.
From here, push your knee forward to dorsiflex your ankle. Move in and out of the stretch. You can also use a scooping motion to stretch different parts of the joint capsule.
Banded leg kicks
Place one foot through a resistance band, with the other end secured to something sturdy. Stand on the other leg and kick the band out to the side. Perform 20 reps, then turn around, and kick the band inwards.
Whilst it looks like you are using the muscles of the leg which has the band around it, you are actually using all the stabilizing muscles of the foot and ankle that are planted on the floor to control your stability.
Stage 3 – Get Ready To Run
At this point, your ankle is starting to feel much better, the range of motion has almost returned to normal, and you’re regaining some confidence that you might soon be able to run.
A quick test to see if you are at this stage is if you are able to perform three hops on the spot, with minimal discomfort.
Here’s some drills to perform at this stage, to get you ready for running:
Weighted dorsiflexion stretch
Place your foot on top of a box or bench. Then place a heavy weight on the top of your knee. Use the weight to drive your knee forwards, stretching out your ankle. Move in and out of the stretch. You can also use a scooping motion to stretch different parts of the joint capsule.
Banded Ankle Eversions
In sitting, place a resistance loop band around your feet. Make sure there is tension in the band. Turn your foot outwards – this is called “eversion” and helps to strengthen the peroneal muscles which resist the motion that occurs when you roll your ankle.
Hopping to a target
Place a few targets (like some tape) on the floor. Stand on one leg and practice hopping between the targets. Focus on your accuracy – make sure to land spot-on the target on each repetition.
Stage 4 – Run!
Once the mobility, strength, and balance in your injured ankle is equal to your other side (or at least 90% of the way there), then you’re ready to get back into running.
I recommend a graded return to running. Start with a short run on a soft, even surface first (such as running a few laps around a park). Depending on the severity of your ankle sprain, you can gradually return to your normal workload in 1-3 weeks.
Once you’re back to running, the ankle drills below will help reduce the chances of future ankle sprains.
Ankle Sprain Prevention
Of course, prevention is much easier than cure! Ankle strength and proprioception drills should be part of your regular training program, especially if you run on trails or uneven surfaces.
These drills don’t need to be performed every day – even just once or twice a week is a great place to start. Here are some of my favorite drills to help reduce the likelihood of ankle sprains:
Eccentric Peroneal Strengthening Off the Side of a Step
Start by placing the outer half of your foot off the step. Slowly control the inversion movement as you roll your ankle over the edge of the step, then use your ankle muscles to pull your foot back into a neutral position. This is a great exercise to strengthen the peroneal muscles.
Wobble disc ball throw
Start by placing a wobble disc (or a small towel) on the ground before you. Step onto the disc and balance on one leg. Then whilst balancing on one leg, practice throwing and catching a ball against the wall.
Address the Entire Kinetic Chain
When it comes to ankle sprains, it’s also important to consider what’s happening further up the kinetic chain. After all, the pelvis is the platform from which our body transfers force between our legs and the rest of our body.
As you run, your pelvis transfers force from your upper body to your lower body and then to the ground. If you have poor pelvic control, this can put extra stress on other parts of the body, including the ankles.
Strengthening the glutes, which can help us improve our pelvic control, can be a great accessory training idea to prevent or recover from an ankle sprain (especially in the early rehab phase when doing any exercises with your ankle is extremely painful!).
The ITB Rehab Routine and Mace Single Leg Routine both focus on the glutes and can help you build pelvic control.
Don’t Forget The Feet
The feet are a runner’s foundation, and they need to be strong to support the rest of the body during running. The muscles, ligaments, and tendons in the feet work together to provide shock absorption and propulsion. When these structures are weak, they cannot do their job properly which can lead to injuries.
Consider the muscles and tissues that hold up the arch of your foot – the purpose of your arch is to act as a shock absorber – as your foot hits the ground, the arch is stretched under load, and this creates a spring as you push off the ground.
You can imagine how much force this spring absorbs as you run (spoiler – it can be anything up to 12 x your body weight!). The spring in your foot reduces this load on the entire kinetic chain above it. There are a bunch of different exercises you can do to strengthen the intrinsic muscles in your foot – so make sure to keep them nice and strong if you’re a keen runner.
Ankle sprains are a common injury, particularly among runners. However, the risk can be reduced by consistently following some simple exercises to improve your proprioception, mobility, and strength.
So get moving and start strengthening those ankles!
Don’t miss these resources:
- Our free email series on injury prevention (workout routines, case studies, what NOT to do, and more)
- High Performance Lifting (our flagship weightlifting program)
- Bodyweight Power (our bodyweight strength program)
And if you want to stay healthy long-term, you need to be diligent about injury prevention. A good injury prevention program will help you stay healthy and keep your gains, so that you can keep smashing your goals for years to come.
***
This article was written by Dane Ford, the founder of Lift Physiotherapy and Performance in Sydney, Australia. Lift Physio aims to help you overcome injury, optimize your health, and unlock your full movement potential.

